https://www.youtube.com/watch?v=CXWCnoX3p-g
Wondering what it takes to embroider an eye-catching design on a leather jacket? Then watch as we walk you through the entire process of embroidering a big, bold, and colorful design on the back of a leather jacket in this exciting episode of Embroidery Hub.
Determine your pricing using our easy formula: https://youtu.be/PuF5hAdYlNo
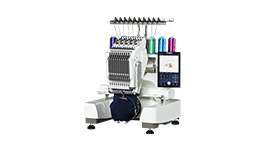
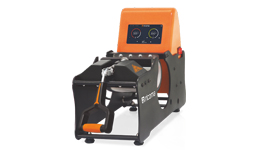
Learn more about our MT 7S 15-needle commercial embroidery machine: https://ricoma.com/US/machine/mt-1501
Join the Ricoma newsletter for educational blogs, videos, and live webinars: https://info.ricoma.com/newsletter
To learn more, schedule a virtual demo today: https://ricoma.com/US/virtual-demo
Get our latest Ricoma embroidery YouTube videos sent straight to your Facebook Messenger: https://manychat.com/l2/RiCOMA.us
To learn more about our embroidery machines, visit our website: https://ricoma.com/US
Digitizing By: http://greatdigitizing.com/
00:38 – Profit Potential
02:44 – The Embroidery Process
03:44 – Hooping
07:01 – Panel Instructions
Profit Potential
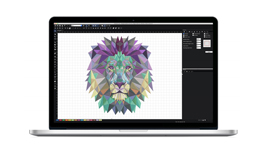
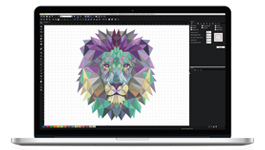
Leather jacket embroidery has an incredible profit potential. Here’s the rundown: The jacket used for this episode was purchased for $40 and the thread and backing were purchased for $2. Digitizing this design (313,503 stitches with over 15 colors) would cost $70. However, depending on the size of your design, digitizing it would essentially cost anywhere from $40-$80. In conclusion, the cost of this project would be a total of $122 to produce.
As for pricing, leather jackets can be sold on Etsy for about $200. But considering the size and complexity of the design, the price for this product would fall into the $300-$350 range. And, after deducting the $122 cost to make it, it would leave you with a profit of $228 for just one day of work.
The Embroidery Process
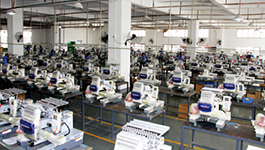
For this project, we used our MT 7S 15-needle commercial embroidery machine and the table that comes with it to support the weight of the jacket. This machine is perfect for this project because along with the table, it also includes a sash frame that can fit a design up to 21x40 inches. Also, we used the sash frame because of the jacket’s thickness. (Using a sash frame can help you spread the fabric and clamp it down to get it to hoop tightly and smoothly.) As for the backing, we used one sheet of 1.5 oz cut-away because the fabric is already thick enough to support all stitches. Additionally, we used a 75/11 needle.
Hooping
Center the jacket using the collar as a reference and your hand as the guide to find the middle point of the jacket. Then, use the hooping brackets by first placing one onto the bottom of the jacket, then the other on the top and the remaining brackets on the sides of the jacket to hoop it tightly. After, make sure there are no wrinkles or bubbling of the fabric.
Panel Instructions
Load your design by first pressing the ‘File’ key and then the ‘OK’ button. Following that, set the stitches per minute speed at 850. (This is done to prevent shredding since we use metallic thread for one of the steps.) After that, choose your hoop by pressing the ‘Design Set’ key and the ‘Other’ hoop option for the sash frame. Press ‘OK’. After it’s done adjusting the hoop, you’ll hear three beeps. Then, rotate the design. You’ll hear an additional three beeps that indicate your design is ready. Now go to your ‘Color Selection’ tool and your colors. After that, enter the embroidery status to begin tracing the design. Finally, after tracing your design and ensuring it is centered and fits perfectly, you can press the ‘Start’ button and begin to embroider.
Profit Potential
Leather jacket embroidery has an incredible profit potential. Here’s the rundown: The jacket used for this episode was purchased for $40 and the thread and backing were purchased for $2. Digitizing this design (313,503 stitches with over 15 colors) would cost $70. However, depending on the size of your design, digitizing it would essentially cost anywhere from $40-$80. In conclusion, the cost of this project would be a total of $122 to produce.
As for pricing, leather jackets can be sold on Etsy for about $200. But considering the size and complexity of the design, the price for this product would fall into the $300-$350 range. And, after deducting the $122 cost to make it, it would leave you with a profit of $228 for just one day of work.
The Embroidery Process
For this project, we used our MT 7S 15-needle commercial embroidery machine and the table that comes with it to support the weight of the jacket. This machine is perfect for this project because along with the table, it also includes a sash frame that can fit a design up to 21x40 inches. Also, we used the sash frame because of the jacket’s thickness. (Using a sash frame can help you spread the fabric and clamp it down to get it to hoop tightly and smoothly.) As for the backing, we used one sheet of 1.5 oz cut-away because the fabric is already thick enough to support all stitches. Additionally, we used a 75/11 needle.
Hooping
Center the jacket using the collar as a reference and your hand as the guide to find the middle point of the jacket. Then, use the hooping brackets by first placing one onto the bottom of the jacket, then the other on the top and the remaining brackets on the sides of the jacket to hoop it tightly. After, make sure there are no wrinkles or bubbling of the fabric.
Panel Instructions
Load your design by first pressing the ‘File’ key and then the ‘OK’ button. Following that, set the stitches per minute speed at 850. (This is done to prevent shredding since we use metallic thread for one of the steps.) After that, choose your hoop by pressing the ‘Design Set’ key and the ‘Other’ hoop option for the sash frame. Press ‘OK’. After it’s done adjusting the hoop, you’ll hear three beeps. Then, rotate the design. You’ll hear an additional three beeps that indicate your design is ready. Now go to your ‘Color Selection’ tool and your colors. After that, enter the embroidery status to begin tracing the design. Finally, after tracing your design and ensuring it is centered and fits perfectly, you can press the ‘Start’ button and begin to embroider.